Reproducing your artwork
How to take the best possible photos of your artwork
You need good quality photos of your artwork either for use on your Facebook, website or for producing giclee prints or greeting cards.
With most modern digital cameras it is quite easy to take fairly good quality photos of your artwork.
For particularly large, or important artworks, you should consider going to a studio based professional photographer to get your work photographed. Specify that you want a "RAW" digital image file, as this will enable a wide dynamic range or colour gamut, which is important for good colour fidelity to the original.
Lighting
You will need bright soft lighting and natural daylight is perfect for this, an overcast day is best as it avoids any glare from harsh sunlight.
So set up your artwork outdoors if possible or near to a large window indoors.
Setting up your camera
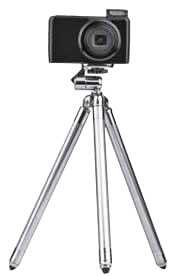
To make sure the image is sharp it's important that the camera doesn't move while the image is being taken. The best way to do this is by using a tripod, you can buy a perfectly adequate one for less than £20. Alternatively choose a flat level surface to rest your camera on.
Setting up your artwork
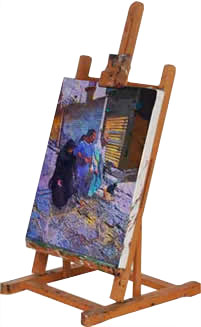
 Use a clean simple background and make sure your artwork is parallel with the lens of the camera. If the artwork needs to be on a slant to stand up, then tilt the camera to match the angle.
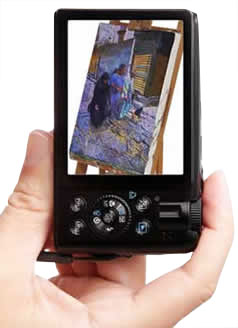
Move the tripod close enough to the painting so the viewfinder is filled with the image of the painting
Taking the photo
It's important to make sure that your flash is turned off, this avoids any hotspots of lighting when the flash is so close to the artwork. If indoors turn off all room lights too as artificial lighting can cause an undesirable colour cast on your image.
It's a good idea to zoom in just a little as the normal focal length of some digital cameras when first switched on can be slightly wide angle and this can cause some distortion of the image.
To get the best possible image quality from your camera you need to use the highest image quality setting. Use the camera settings menu to select "sensitivity" and choose ISO 100 or 200. If you're not sure how to do this, then just leave your camera on "Auto Mode".
If possible use the camera's self timer to take the photo to keep your camera perfectly still, doing this creates a delay between when you press the shutter and the image being taken and avoids camera shake spoiling the image.
Photo editing
There are lots of photo editing applications for editing your image - useful tools for checking the image is in focus, cropping the image and also making any required colour and density adjustments.
Adobe Photoshop Elements contains most of the features of the professional version of Photoshop, but with fewer and simpler options. It will do the job of image editing very well and costs less than £100.
Pixlr Editor is a free online photo editor with a professional touch ... A very capable set of tools which rival professional programs.
Is my image file good enough quality for a greeting card?
The minimum order is just one card. So the best way to find out how your image might look is to create a card design using your photo and order just one card as a proof. Remember that we archive every card we print, so if you are happy with the result you can just go to our re-order page and order more cards.